How to Calibrate a Drone: Steps for Optimal Performance
*We may earn a commission for purchases made using our links. Please see our disclosure to learn more.
How to Calibrate a Drone: Ensuring Accurate Flight and Performance
Calibrating a drone is a fundamental step I take to ensure its optimal performance during flight. It’s akin to setting up a precise and level foundation before constructing a building. This process of how to calibrate a drone, aligns the drone’s sensors to guarantee that the drone responds accurately to my control inputs and behaves predictably in various flying conditions. I always refer to the manufacturer’s instructions because each model has its unique calibration procedure, but the general principle revolves around establishing a baseline for the drone’s sensor readings.
Before I begin a calibration, I make sure that the drone is on a flat surface, as this provides a consistent starting point for the sensors, like the accelerometer and compass. Depending on the drone, I might rotate it along different axes or connect it to a computer if required by the calibration process. In my experience, a properly calibrated drone not only follows commands more reliably but also maintains stability when hovering or moving through the air, even in challenging environmental conditions.
Regular calibration is part of my routine maintenance, especially if I notice any irregularities in flight or after a firmware update. This is because software changes can affect how the drone interprets sensor data. By keeping my drone calibrated, I enhance its flight stability, accuracy, and the overall safety of my flying experience. Calibration ensures that when I pilot my drone, I am in control, with the drone accurately responding to my commands and reducing the likelihood of errors or unexpected behavior.
How to Calibrate a Drone: Preparation for Calibration

Before initializing the calibration of my drone, I ensure to prepare meticulously to avoid errors during the process. Selecting an appropriate environment for calibration and checking all system requirements are key steps I follow.
Choosing the Right Environment
I always choose an open area to minimize potential electromagnetic interference with the drone’s magnetometer during calibration. It is important that the location is free of metal objects and electronic devices that could disrupt the process. For my drone’s compass calibration, I make sure to be in an environment that allows for clear, unobstructed movement in all directions.
- Level Surface: I place my drone on a level surface, such as a flat table or a piece of wood, verifying its evenness with a spirit level.
- Temperature: I allow the drone to acclimate to the ambient temperature of the calibration environment, ensuring it is neither too hot nor too cold, as extreme temperatures can affect sensor performance.
Battery and Firmware Requirements
Prior to calibrating, I check the following:
- Fully Charged Battery: The drone and my remote control must be fully charged. This ensures that there is sufficient power for the completion of the calibration process without interruption.
- Drone Battery: 100%
- Remote Control Battery: 100%
- Firmware Update: I verify that my drone’s firmware is up to date. If an update is required, I connect my drone to my PC using a USB cable and perform the firmware update as per the manufacturer’s instructions.
How to Calibrate a Drone: IMU Calibration

IMU calibration is vital for maintaining precise flight characteristics and stabilization in drones. This process aligns internal sensors to ensure accurate orientation and movement data is relayed to the flight controller.
Understanding the IMU
The Inertial Measurement Unit, or IMU, is critical for my drone’s stability and handling. It combines various motion sensors to detect changes in velocity and orientation, relaying this information to the flight controller. Before I calibrate the IMU, I ensure the drone is on a flat surface, free from vibrations or movement that might skew the calibration process. It’s essential to understand that the IMU feeds data on the drone’s position and any spatial changes, which the flight controller uses to adjust the motor speeds accordingly for stable flight.
Performing IMU Calibration
When I’m ready to calibrate the IMU, I follow these steps for a successful procedure:
- Preparation:
- Ensure the Drone Is Powered Off: Before starting, the drone should be turned off.
- Place on a Flat and Stable Surface: Any errors in this step can affect the calibration’s accuracy.
- Calibration Process:
- Power On the Drone: Turn on the drone and initiate the calibration mode via the controller or app.
- Start IMU Calibration: This can typically be done through the flight controller software or a dedicated drone app.
- Remain Stationary: Keep the drone immobile during the calibration process to prevent any errors.
- Completion: Once the calibration process is complete, the drone will usually signal this with a notification or light signal.
Regular IMU calibration ensures the drone’s internal sensors accurately detect movement and orientation, leading to improved flight performance and stability.
How to Calibrate a Drone: Compass Calibration

In this section, I’ll discuss the essential steps and reasons behind compass calibration in drones, a crucial component for ensuring stable and accurate flight paths.
Importance of Compass Health
The compass in a drone is pivotal for maintaining orientation and stability during flight. It works in conjunction with the GPS to enable precise navigation by aligning the drone’s flight systems to the Earth’s magnetic north. Calibration of the compass is essential because the Earth’s magnetic field is not static and can be influenced by factors such as magnetic interference from metal objects. Even small changes can lead to significant navigational errors if not addressed. Regular compass calibration ensures my drone’s compass reflects the geomagnetic environment accurately.
Executing Compass Calibration
When I calibrate my drone’s compass, I adhere to a series of steps to ensure the compass is aligned correctly with the Earth’s magnetic field. Here is a concise list of the calibration process, tailored for a DJI drone, which is representative of the procedures used for most modern drones:
- Preparation:
- Ensure my drone’s battery level is above 50%.
- I find an open area free of metal objects to avoid magnetic interference.
- Initiating Calibration:
- In the settings menu of my drone’s app, I select the compass calibration option.
- I follow the on-screen instructions to start the process.
- Physical Calibration:
- With the drone powered on, I hold it horizontally and rotate it 360 degrees as directed.
- After the first rotation, I hold the drone vertically, with the nose pointing down, and rotate it 360 degrees again.
Position Rotation Horizontal 360 degrees, keeping level and even Vertical 360 degrees, nose down - Finalization:
- The drone’s lights or the app will indicate when the compass calibration process is complete.
- I ensure that there are no error messages, and the compass status shows as calibrated.
It is necessary to recalibrate the compass if my drone experiences erratic behavior, after travelling long distances, or if advised by the drone’s flight control app. While calibrating, it’s crucial to avoid areas with strong magnetic fields or large metal structures to prevent deviations in the calibration. Remember, accurate compass calibration is synonymous with safer and more reliable drone operations.
How to Calibrate a Drone: Gimbal and Sensor Calibration

In this section, I’ll show you the crucial steps for ensuring that your drone’s gimbal and sensors operate with precision, directly affecting flight stability and hover performance.
Balancing the Gimbal
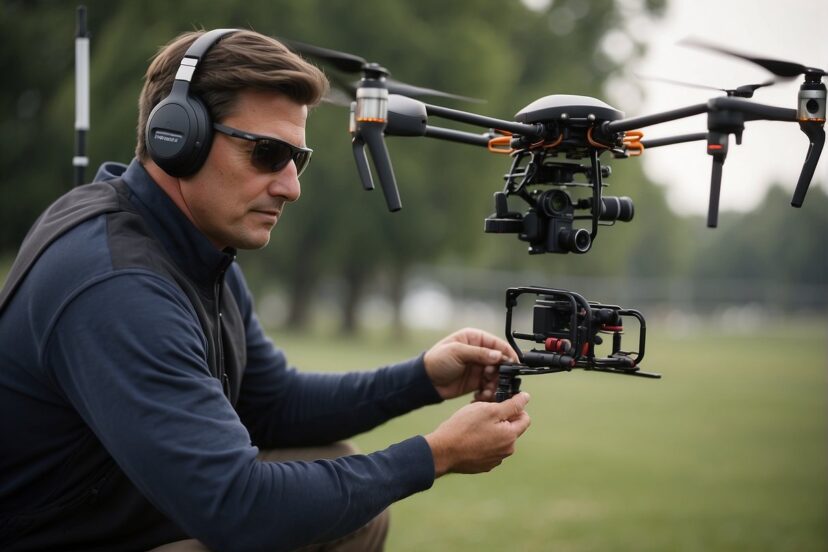
Calibrating the gimbal is essential for maintaining stable footage. I begin by ensuring that the drone is on a flat surface. I access the gimbal calibration option within the drone’s software. The process typically involves holding the drone in various positions as instructed by the app or controller. It’s critical to have the gimbal free from obstructions and the camera at the right balance point before starting the calibration.
Calibrating Additional Sensors
For sensor calibration, I focus on the accelerometer, gyroscope, and vision sensors, which contribute significantly to flight control and performance.
- Accelerometer Calibration:
- I keep my drone on a level surface.
- I access the calibration settings from my drone’s software.
- I follow the on-screen instructions to calibrate, which usually requires me to keep the drone still for a few moments.
- Gyroscope Calibration:
- I find it best to calibrate the gyroscope if I notice drifts or stability issues.
- The process is similar to the accelerometer, often combined in the software.
- Vision Sensor and Barometer Calibration:
- Calibration for vision sensors ensures that my drone can hover and navigate accurately.
- I ensure the sensors are clean before starting and calibrate only in good lighting.
- For the barometer, which helps in altitude stabilization, I usually don’t need to calibrate it manually as modern drones typically self-calibrate.
Through careful calibration of these components, I enhance the overall sensory feedback of my drone, resulting in smoother flight and reliable stability.
How to Calibrate a Drone: Final Checks and Troubleshooting

After calibrating my drone, it is crucial to perform final checks to confirm the calibration was successful and to troubleshoot any potential problems. These steps are essential to ensure optimal performance and safety during flight.
Verifying Calibration Success
I always ensure the following indicators are present to verify successful calibration:
- Stability in Takeoff: The drone should hover steadily without drifting.
- Accurate Response to Controls: Input to the drone’s controls should be precise and instant.
- Consistent Flight Patterns: Flight paths should follow my intended directions without deviations.
If any abnormalities are detected, I promptly reassess the calibration process.
Common Calibration Issues and Solutions
In my experience, common calibration issues include:
- Drift or Erratic Flight Behavior: This often suggests an issue with the accelerometers. A recalibration or resetting to factory settings may rectify this.
- Unexpected Flyaways: I check that the ‘Return to Home’ feature is operational and that there is no physical damage to the propellers or other components.
- Shortened Battery Life or Performance Issues: Regular maintenance checks are crucial as these could indicate deeper issues not necessarily solved by calibration alone.
I adhere to these simple yet effective troubleshooting steps:
- Consult the manual: I refer to the drone’s user guide for specific error messages and corresponding solutions.
- Firmware updates: Ensuring the drone’s software is up-to-date can solve some calibration issues.
- Physical assessment: I inspect for visible damage that might affect flight stability.
By thoroughly performing these final checks and addressing any troubleshooting issues, I maintain the safety and longevity of my drone, which contributes to a more enjoyable flight experience.
Optimizing Flight Performance Post-Calibration
After calibrating a drone, such as a DJI model, it’s essential to conduct flight testing and adhere to regular maintenance to ensure peak performance. This guarantees the flight controller, compass, and other sensors maintain accurate positioning for stable control during flights.
Flight Testing
When I initiate flight testing, my primary focus is on assessing the drone’s response to controls and its ability to navigate accurately. I pay close attention to:
- Angular velocity: How smoothly the drone turns at my command.
- Flight stability: The ability to hover without drifting, even in light winds.
- Altitude hold: I check if the drone maintains altitude with minimal throttle adjustments.
My flight tests follow a systematic process:
- Takeoff: I ensure a stable hover at a low altitude.
- Basic maneuvers: These include forward, backward, and side-to-side motions to test control.
- Rotational tests: To examine yaw control and compass functionality.
- Return to home: I verify the drone can autonomously return to its takeoff point accurately.
Regular Maintenance and Calibrations
For the best flight performance, I commit to a routine of maintenance and recalibration at the following frequency intervals:
- After 20 flight hours: Check sensors and recalibrate if there’s deviation.
- Post firmware updates: Always recalibrate to ensure the firmware changes are correctly integrated into the drone’s system.
On top of these, I monitor the performance through the drone app and take note of any irregularities in flight performance, which may indicate the need for recalibration. Regular maintenance includes:
- Compass inspection: I inspect for and rectify any magnetic interference.
- IMU checks: Ensuring accurate readings for optimal flight dynamics.
- Propeller and motor examination: To prevent vibrations that can affect flight stability.
FAQs About How To Calibrate a Drone
In this section, I will cover crucial aspects of drone calibration, from initial steps to software recommendations and handling common issues, ensuring you gain a comprehensive understanding.
1. What are the essential steps in calibrating a drone for the first time?
The essential steps include ensuring the drone is placed on a flat surface, following the manufacturer’s guidelines for IMU, compass, and gimbal calibration, and often connecting the drone to a PC or using an app to complete the process effectively.
2. Can you recommend any drone calibration software for maintaining stability?
For maintaining stability, I recommend using the calibration software provided by the drone manufacturer. This software is tailored to the drone’s specifications and provides step-by-step instructions for accurate calibration.
3. What is the process for calibrating a drone’s controller to ensure proper control?
Calibrating a drone’s controller usually involves using the drone’s companion app or onboard settings to adjust the sensitivity, input, and responsiveness. Ensure the controller is at rest on a stable surface during this process.
4. How often should you perform calibration on a drone’s accelerometer and gyroscopes?
Calibration of accelerometers and gyroscopes should be conducted before the first flight, if the drone hasn’t been used for an extended period (usually over a month), or when flying in a new location that’s several miles away from the previous calibration area.
5. What could cause a drone to drift or fly to one side, and how can this be corrected?
Drift or uneven flight could be caused by imprecise calibration, damaged propellers, or environmental factors such as wind. To correct this, recalibrate the drone and inspect for any physical damage that needs repair.


